2

Tech Blog

×

Warning

JUser: :_load: Unable to load user with ID: 94

5 Ways to Share Files From PC or Laptop to Android Phone

Need to move data from your laptop to your Android device? Here are some fast mobile to PC transfer methods you can try.

How to Disable Handoff and Stop It Appearing in Your Mac's Dock

Do you get annoyed by the Handoff icons that keep appearing in your Mac’s Dock? Here’s how to disable Handoff and get rid of them.

Handoff makes it ridiculously easy to continue tasks from your iPhone, iPad, or Apple Watch on your Mac, without breaking your flow. However, if you don&rsquot use the feature or find those icons in the Dock annoying, you have the option of turning it off.

We&rsquoll show you how to disable Handoff below. But first, we wanted to make sure you were aware of all the potential consequences that come from turning off Handoff.

What Happens When You Disable Handoff?

By default, you&rsquoll see little icons appear in the Dock whenever you&rsquore using Handoff on your Mac. These give you the option of continuing activities from other Apple devices. If that distracts you, or you end up handing off tasks by accident, you can choose to disable Handoff instead.

However, turning off Handoff on your Mac will also cause you to miss out on both Universal Clipboard and Universal Control. If you regularly use one or both of the above features, you&rsquoll need to keep Handoff enabled on your Mac to keep using them.

Disable Handoff on a Mac From the System Preferences

You can disable Handoff on your Mac via the System Preferences app in macOS. To do that:

  1. Open the Apple menu and select System Preferences.
  2. Select General.
  3. Disable the box next to Allow Handoff between this Mac and your iCloud devices.
 

How to Disable Handoff Prompts From Other Apple Devices

If you want to prevent Handoff prompts from a specific device, consider disabling Handoff on that device instead. That will allow you to continue using the feature between your Mac and any other Apple devices you own.

We&rsquove already covered the Mac. If you want to disable Handoff on an iPhone, iPad, or Apple Watch, then follow these steps:

On an iPhone or iPad

  1. Open the Settings app and tap General.
  2. Tap Handoff & Airplay.
  3. Disable the switch next to Handoff.
3 Images

On an Apple Watch

  1. Open the Watch app on your iPhone.
  2. Tap General.
  3. Disable the switch next to Enable Handoff.
2 Images
 

Get a Distraction-Free Mac Dock

Handoff makes it easy to switch between tasks on your iPhone and Mac, but if you never use it then you might get fed up with seeing Handoff icons in the Dock all the time. Luckily, it&rsquos easy to disable Handoff on your Apple devices to make them less connected all the time.

 SOURCE: MUO
 

How to Color Code Your Folders in Google Drive

Are you tired of seeing the same old gray folders? Here's how you can color-code your folders in Google Drive to better organize them.

It’s hard to imagine a world without cloud storage. The problem is that the more cloud storage you have, the more you use, and if you don’t organize your Google Drive correctly, it can turn into utter chaos.

To help you keep your Google Drive looking neat and tidy, here’s how to assign a color to your Drive folders.

How to Color Code Your Google Drive Folders

To assign a color to one of your Google Drive folders, start by right-clicking your chosen folder. Hover over Change Color in the options list, and then select the color for your folder.

If you want to change multiple folders to the same color, then select the folders first and then follow the same process. It’s as simple as that. Once you realize how easy it is to color-code your Google Drive folders, you’ll have a rainbow Drive in no time.

Presently on Google Drive, there are only 24 colors to choose from, but it’s more than enough to start color-coding your folders and organizing your Google Drive like a pro. If you want to go even further, then there are lots of handy Google Drive add-ons to try.

Why Color Code Your Google Drive Folders?

Besides making your Google Drive a bit more colorful, assigning colors to your Google Drive folders is also a great way to organize your storage space visually. Color-coded folders can be found more quickly in a busy Drive and can be used to differentiate between folders of the same name.

If you have folders in your Google Drive with different sharing settings or access levels, these can also be color-coded to make them easily recognizable.


Making the Most of Your Google Drive

Google Drive is quickly becoming a staple in every workplace. It integrates with Slack, can be rapidly expanded, and allows for effortless collaboration between team members. To make sure you’re getting the most from Google Drive, check out some of our other Google Drive tips.

Source: MUO


How to Sync Data Across Microsoft Excel Documents

You can set up Excel to automatically import data from one file to another, which is a great feature for creating summary spreadsheets. Here's how!

Microsoft Excel offers two ways to link data: one is between spreadsheets in the same file, the other is between spreadsheets in separate files. Here, we’ll show you how to link two Microsoft Excel spreadsheet files and have data automatically imported from one into the other.

With this method, you don’t need to link Excel documents together. What’s more, when new data is input into the source file, the destination Excel file is updated immediately to reflect the change.

How to Sync Data Between Microsoft Excel Files

Here we’ll show you how to make it such that when data is entered into one Excel file ("Source data" in our example), it is automatically imported into another ("Destination file"). This is just one of the many ways to save time when using Microsoft Excel.

Here is what the source file in our example looks like.

To synch data between Excel files, do the following:

  1. Open both Microsoft Excel documents.
  2. In the destination file, click on the cell into which you want data to be automatically imported and press the Equal to key on your keyboard.
  3. Switch over to the source Excel file and click on the cell from which you want data exported.
  4. Switch back to the destination file. You’ll see a formula in the cell in which you were working.
  5. Remove the dollar signs from the equation. They are part of the cell reference portion of the equation.
  6. Hit Enter.
  7. You can now copy this cell and paste it into any cell in the destination file which you want to mirror in the source file. With it set up this way, the corresponding cell in the source file will be linked to the cell in the destination file. For instance, if you copy and paste this formula into cell A5 of the destination file, it will be linked to cell A5 in the source file.
  8. You can also drag the cell from the bottom right corner to fill the column. All cells formatted this way will reflect corresponding cells in the source file.

Any time data is added to the source file, it will be automatically filled in to the corresponding cells of the destination file, provided those cells contain the formula we’ve used above.


General Formula for Automatically Importing Data in Excel

The power of Microsoft's spreadsheet is that it lets you get the most out of your work with a few of Excel’s advanced features. All you need to know is a few handy formulas. Here’s the formula for importing data into Excel files in general. You can type it in manually if you don’t have the source file open.

You’ll need to replace "File_path" with the actual file path of your source file, "File_name" with the name of the source file including the extension, "Sheet_name" with the name of the Excel worksheet, and "Cell_reference" with the cell in the source file from which data is to be imported. Don't forget to keep the quotation marks and exclamation point.

You can use it directly if you know the file path, file name, sheet name, and cell from which data is to be imported.

Here’s the formula as used in our example:

='D:\Excel doc data sync\[Source data.xlsx]Sheet1'!A3

Work Smarter and Increase Your Productivity in Excel


The simple method to automatically import data in Microsoft Excel by syncing files will save you a load of work and increase your productivity. It makes creating summary spreadsheets a breeze, and you can have all the relevant data on separate Excel sheets without the extra hassle of having to manually set them up.

Source: MUO


How to Create Log and Semi-Log Graphs in Google Sheets

Log graphs have both axes scaled on log, and semi-log graphs have one of the two axes scaled on log. How to create them in Google Sheets.

Semi-log and log-log graphs are powerful tools for analyzing data. A relationship between two datasets might not show itself on a plain graph, while a log graph could bring its secrets to light.

Google Sheets is a capable spreadsheet app that allows you to create various types of charts. What's more, you can create semi-log or log-log graphs in Google Sheets with only a couple of clicks. Read on to learn how you can create logarithmic graphs in Google Sheets.

How to Create a Semi-Log Graph in Google Sheets

A semi-log graph is a graph that has a single logarithmic axis. In most cases, this is Y or the vertical axis. So in a semi-log graph, the Y-axis will be logarithmic, while the X-axis remains even.

To demonstrate this, let's take a look at an example. In this sample spreadsheet, we have the count of cells in cell culture on different days. Let's create a normal line graph, and then make the Y-axis logarithmic.

The first step, is to create a line graph in Google Sheets. Once you have a line graph, you'll need to go to the graph settings and make the vertical axis logarithmic.

  1. Select your data table. That'll be A1 to B6 in this example.
  2. Go to the Insert menu.
  3. Select Chart.

Google Sheets will automatically determine the ideal chart type for this data table. Likely, your graph is already a line graph. However, if it's not, you can easily change it.

  1. Double-click on your chart to bring up the Chart editor.
  2. Go to the Setup tab.
  3. Under Chart type, select Line chart.

Now you have your line chart. Take a look at the curve and remember what it looks like now for reference. It's time to turn this into a semi-log graph.

  1. Double-click the graph to bring up Chart editor.
  2. Go to the Customize tab and then Vertical axis.
  3. Under Vertical axis, check Log scale.

Now you have a semi-log graph where the Y-axis is on a logarithmic scale. Take a look at your graph now. Since the values in our sample were exponential (they were all powers of 12), the logarithmic graph is a straight line.

Calculating the attributes and the course of a straight line is much easier, when compared to the previous graph.

How to Create a Log-Log Graph in Google Sheets

On some occasions, your analysis or calculation might require both axes to be on a logarithmic scale. That's where the log-log graph comes in. In a log-log graph, both the X and the Y axes are on a logarithmic scale. When both the Xs and the Ys are exponential, a log-log graph produces a straight line.

In a sample similar to the previous one, we have the cell counts of a culture in different days. This time the days, or the X axis, are exponential too. Just like before, you need to create a line graph first.

  1. Select your data table. That will be cells A1 to B6 in this example.
  2. Go to the Insert menu.
  3. Click on Chart.

Google Sheets will automatically create a line graph for you. Now it's time to make that a log-log graph.

  1. Double-click on the chart to bring up Chart editor.
  2. Go to the Customize tab.
  3. Open the Vertical axis tab and check Log scale.
  4. Open the Horizontal axis tab and check Log scale.

Lo and behold! Your broken line is now a straight line when put on a log-log scale. Now you can discover the secret relations between your data with more ease.


Logarithmic Graphs in Google Sheets

Logarithmic scales on graphs are much like a key to a new world. Logarithmic scales grant you perspective and show you things that you couldn't see on an ordinary scale.

While a semi-log graph has a single axis on a logarithmic scale, a log-log graph has both axes on a logarithmic scale. Google Sheets can help you illustrate both of these graphs, and now you know exactly how to do that.

Source: MUO

Headphones vs. Earbuds: What Should You Buy?

If you're want portable personal audio, it comes down to headphones and earbuds. But, which is best, and what should you buy?

Headphones vs

Whether you’re an audiophile or simply want to listen to your tunes on the road, you’ve probably encountered this question when buying a personal sound device—should I buy headphones or earbuds?

Both offer their pros and cons, so there’s no one correct answer for all users. But to help you choose which is the best option specifically for you, you should check the following considerations.

Affordability

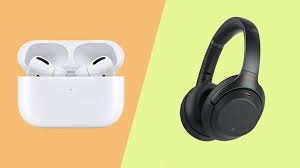
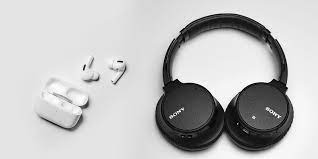
Looking at premium brands, you’ll find that earbuds are generally more affordable than headphones. For example, the Sony WF-1000XM4 earbuds currently retail for $70 less on Amazon than the comparable Sony WH-1000XM4 headphones. Similarly, the Apple Airpods Max headphones retail for more than double the price of the Apple AirPods Pro earbuds.

However, if you really desire headphones, you can look at less popular brands like Anker’s Soundcore and TaoTronics, which offer quality devices at a more affordable price point.


Battery Life

Battery life

Given that headphones are larger than earbuds, it’s expected that the former will have longer battery life than the latter. And despite earbuds getting extra battery power from their cases, it’s usually not enough to compete with the physically larger batteries on headphones.

Consider this: Sony’s WH-1000XM4 headphones have a manufacturer-indicated 30 hours of battery life, but its WF-1000XM4 counterpart only lasts eight hours on a single charge. Given that you can quickly recharge it in its case, it only provides an additional two more full charges, giving you a total of 24 hours of power.

Comfort

This metric is pretty subjective, as one headphone or earbud design that’s comfortable for one user might not be perfect for another. Nevertheless, here are some things you should know.

Since earbuds go directly into your ear, an uncomfortable design can cause pain in your outer ear canal. Or if they don’t fit well, they tend to fall out when you’re moving.

On the other hand, headphone designs can be quite uncomfortable, especially if the headband design is too tight for your head or if the band is too thin, causing pressure on your scalp. Furthermore, a poorly designed ear cup can make your ears too warm. This will cause excessive sweating, making it uncomfortable to wear in the long run.

No matter what design you choose, it’s best to try out a design before buying it. And it’s not enough that you try a headphone or earbud, as different styles have different fitments. Instead, you should try the specific model you want to buy so you know it will fit your ears or head well.


Connectivity Options

One advantage that most headphones have over earbuds is the option for wired connectivity. True wireless earbuds can only connect wirelessly over Bluetooth. But wireless headphones usually also have an auxiliary 3.5mm or 2.5mm jack for wired connectivity. You can dive deep into the difference between wireless and true wireless headphones, because there are more than a few features to consider between the two.

This option lets you connect the headphone to your smartphone or computer. You can even find an adapter, such as the Crystal Mic Pro XS, to use wireless headphones as a wired general aviation headset.


Longevity

Given that headphones have generally larger batteries than earbuds, you’ll also find that these tend to last much longer. That’s because the larger battery capacity means you don’t cycle through it as much, therefore extending its life.

Furthermore, a headphone’s larger form allows a tougher build than earbuds. For example, most true wireless earbuds are made from plastic, as making them from metal or metal alloys will be too heavy to wear.

However, it’s normal to see premium headphones have metal parts. That’s because the headphone’s band will support this extra weight. This design spreads the weight over a larger area while keeping it secure on your head.
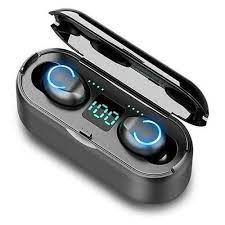
 

Portability

There’s no question that earbuds are much more portable than headphones. Earbuds have a small form factor, even if you consider their case. You can easily pocket these devices or slip them into a small section of your laptop bag.

Headphone's are simply impossible to slide into your pocket, even if you’re wearing harem pants or cargo shorts. The most portable a pair of headphones can be is when you slide them off your ears and wear them on your neck.

This still comes with a caveat, as they’re typically uncomfortable to wear around the neck, at least for long periods. They can be too warm and impede your head’s movement.


Repairability and Customizability

The small form factor of earbuds makes them notoriously difficult to repair. They’re hard to disassemble and reassemble, with several electronic repair channels on YouTube saying they’d rather not work on the earbuds, and local repair shops flat out refusing.

On the other hand, headphones are much easier to repair. You can even easily order spare batteries for popular models like the Sony WH-1000XM3. However, you have to note they’re usually third-party batteries and not OEMs.

You can also replace the ear cushions on some headphones, so you can easily do so if they’re worn or if you want to customize them. Just order the cushions you want to use, pop off the old earpads, and place the new ones you just bought.


Sound Quality

When comparing earbuds and headphones with similar price points, you’ll find headphones consistently outperform the former. That’s because headphones’ physically larger size allows them to have bigger and better drivers, in turn allowing for a greater frequency range, thus a more rounded sound profile.

You can also find open-back headphones that deliver better sound quality, according to audiophiles. However, you can now also find open-back earbuds with the new Sony LinkBuds.


Use Cases

While many may say that headphones offer a better listening experience than earbuds, there are still several instances where you will prefer the latter over the former.

For example, when you’re out running, swimming, or exercising, you’ll probably prefer sporty earbuds that allow for greater movement freedom. Earbuds are also preferable for short-distance commutes, especially because they’re easily pocketable.

But if you’re working at home or keeping your headphones in the office, you’ll like the comfortable fit and most headphones. The long battery life of most headphones is also more suitable for long-distance travel, especially if you have a bag where you keep all your stuff with you.


A Better Sound Experience

Both headphones and earbuds have their pros and cons. But no matter what you choose, you at least know what you’re sacrificing when picking one or the other. And while buying stuff online is now more convenient than ever, it’s still highly recommended you try out items you’ll physically wear before buying them.

After all, no one is built exactly the same as another person. So trying out the device before buying will ensure that you’re comfortable with it, avoiding any long-term regrets.

Source: MUO


How to Create Your Own Keyboard Shortcuts in Sibelius

Custom keyboard shortcuts can speed up your workflow in Sibelius. Let's show you how to create them.

You can control every single feature in Sibelius with just a shortcut, but not all shortcuts are easy to get your head around. Luckily, you can customize many of the most common keyboard shortcuts, and it will take you less than a few minutes to do.

Speeding up your workflow couldn't be easier when you assign your favorite functions to keyboard shortcuts. So let's take a look at how to do it.

Create a New Feature Set

shoutcuts

Sibelius organizes shortcuts into feature sets which you can think of as different profiles. By default, there is a profile specifically for Laptop Keyboards and one for School Features. Instead of overriding a default keyboard feature set, start by creating your own.

In the navigation bar at the top of the screen, choose Sibelius > Preferences > Keyboard Shortcuts. Next, select the Add Feature Set button and enter a name for your profile, in this example we've called it "Custom Feature Set".

There is also a checkbox that says Base on default set which is automatically on. It's recommended to keep this option selected, otherwise you will have to start completely from scratch and assign every keyboard shortcut manually. Once you've renamed the feature set, select OK.

If you often work in Google Docs, you might be interested to know that you can also add music notation to a Google Doc.

Select a Function

shortcuts 1

Features in Sibelius are organized under Tab or category, and then by Feature. To change the keyboard shortcut for a Triplet, for example, select Tuplets from the category list on the left, then select Triplet from the feature list next to it. This will reveal the currently assigned keyboard shortcut and give you the option to add or delete the function.

It takes some time to explore the category and tab list to find the function you are looking for, so to help you get started, here are a few places to begin looking:

  • Line Styles: Features include tempo markings, tempo changes, ties, and vibrato marks.
  • Noteheads: You can find different options for noteheads here, including drum noteheads which are particularly useful for writing percussion scores.
  • Keypad (common notes): Note values can be found in this list, for example, quarter note (crotchet), eighth note (quaver), and so on. Normally these are assigned to a keypad on a full keyboard, so it's particularly handy to reassign these keys if you are working on a laptop.

Not all shortcuts are worth changing, some default Sibelius shortcuts are really handy just as they are. You can find some of these on our list of Sibelius keyboard shortcuts you need to know.


Add a Keyboard Shortcut

Once you have selected the function you want to assign a keyboard shortcut to, there are two options. Either select the existing shortcut and select Delete to remove it, or simply select Add to make a new shortcut alongside the old one. You can have multiple different keyboard shortcuts in Sibelius, so it's not necessary to delete the default shortcut.

When you select Add, a box will appear with a space to type a new key sequence. In our example, we assigned the triplet function to the backslash key. When you're finished, select OK.

Sometimes the key you want to assign isn't available to use because it has already been assigned. In that case, you can either decide to override the existing keyboard shortcut by selecting Yes. Or if you want to go back and try a different key, select No.


Sibelius Keyboard Shortcut Tips

Here are a few key tips to help with creating new keyboard shortcuts:

  • When reassigning keypad functions like the quarter note (crotchet) function, keep in mind that the visible keypad on the screen won't change. Normally the on-screen keypad represents the keypad, so reassigning those functions will mean it no longer matches.
  • Avoid choosing keyboard shortcuts that are normally used by the Mac or Windows operating system, in most cases you won't be able to reassign the shortcut.
  • Most single letters (A, B, C, D, etc.) are already in use by default, however, single punctuation keys are not (, . ' ; [ ]). These make great options for assigning new shortcuts.
  • On a Mac, the control key is practically unused and can be combined with different letters or keys to create new keyboard shortcuts.
  • If you don't like the set of keyboard shortcuts you have and want to go back to the default settings, select Sibelius > Preferences > Keyboard Shortcuts, and under Current Feature Set, select Standard menus and shortcuts from the drop-down menu.

Optimize Your Sibelius Workflow With Custom Keyboard Shortcuts

Remembering new keyboard shortcuts can take a bit of time, but start with some of your favorite selections and add more functions as you go. It takes just a fraction of time to do, and it will no doubt supercharge your workflow.

Source: MUO

How to Listen to Audiobooks on a Google Nest Speaker

Enjoy an audiobook in the comfort of your own home with a Google smart speaker. We'll show you how.

How to Sign Up for Apple One on Any Device

Looking to save some money on your Apple subscriptions? Follow these steps to sign up for Apple One instead.

What Does a Blue Light Ring on Alexa Mean?

We’ll help you better understand the blue light on an Amazon Echo device.

IT Solutions and Support

We are an Information Technology Company driven by service excellence, simplicity, effectiveness, efficiency and timeliness.

We take care of the modern-day tool of business (Information Technology) to allow our clients to focus on their business goals and objectives.

Get In Touch

5 Babajide Close, Off Association Avenue, Ikotun, Lagos

+234 803 3233 193

+234 814 5636 831

info@tishritechnologies.com

https://www.tishritechnologies.com